![]()
|
Note: Be sure to review the parts of the microscope and microscope safety procedures. Links are provided at bottom of page. For a printer friendly version, click here.
During the Renaissance, there occurred many exciting inventions: printing, gunpowder and the mariner's compass, followed by the ultimate discovery of America. Equally remarkable was the invention of the microscope: an instrument that enables the human eye, by means of a lens or combinations of lenses, to observe enlarged images of tiny objects. It made visible the fascinating details of worlds within worlds. Long before any of the above took place, in the hazy unrecorded past, someone picked up a piece of transparent crystal thicker in the middle than at the edges, looked through it and discovered that it made things look larger. Someone also found that such a crystal would focus the sun's rays and set fire to a piece of parchment or cloth. These magnifiers and "burning glasses" or "magnifying glasses" are mentioned in the writings of Seneca and Pliny the Elder, Roman philosophers during the first century AD. Apparently, they were not used much until the invention of spectacles, which took place toward the end of the 13th century. They were named lenses because they were shaped like the seeds of a lentil. The earliest simple microscope was merely a tube with a plate for the object at one end and a lens which gave a magnification less than ten diameters -- ten times the actual size. These became known as "flea glasses" as they were primarily used to view fleas or tiny creeping things. About 1590, two Dutch spectacle-makers, Zaccharias Janssen and his son Hans, while experimenting with several lenses in a tube, discovered that nearby objects appeared greatly enlarged. This became the forerunner of the compound microscope and of the telescope. In 1609, Galileo (1564-1642), father of modern physics and astronomy, heard of these early experiments, worked out the principles of lenses, and made a much better instrument with a focusing device.
Robert Hooke (1635-1703), the English father of microscopy, re-confirmed Anthony van Leeuwenhoek's discoveries of the existence of tiny living organisms in a drop of water. Hooke made a copy of Leeunwenhoek's microscope and then improved upon his design. Later, few major improvements were made until the middle of the 19th century. Several European countries began to manufacture fine optical equipment but none finer than the marvelous microscopes built by the American, Charles A. Spencer (1813-1881), and the industry he founded. Present day instruments, little changed from these early microscopes, give magnifications up to 1250 diameters with ordinary light and up to 5000 with blue light. A light microscope, even one with perfect lenses and perfect illumination, cannot be used to distinguish objects that are smaller than half the wavelength of light. White light has an average wavelength of 0.55 micrometers, half of which is 0.275 micrometers (one micrometer is a thousandth of a millimeter, and there are about 25,000 micrometers to an inch. Micrometers are also called microns.) Any two lines that are closer together than 0.275 micrometers will be seen as a single line, and any object with a diameter smaller than 0.275 micrometers will be invisible, or at best, show up as a blur. To see tiny particles under a microscope, scientists must bypass light altogether and use a different sort of "illumination," one with a shorter wavelength. The invention of the electron microscope in the 1930's eliminated this problem. In this kind of microscope, electrons are speeded up in a vacuum until their wavelength is extremely short, only one hundred-thousandth that of white light. Beams of these fast-moving electrons are focused on a cell sample and are absorbed or scattered by the cell's parts so as to form an image on an electron-sensitive photographic plate. If pushed to the limit, electron microscopes can make it possible to view objects as small as the diameter of an atom. Most electron microscopes used to study biological material can "see" down to about 10 angstroms. Although this does not make atoms visible, it does allow researchers to distinguish individual molecules of biological importance. In effect, it can magnify objects up to 1 million times. Nevertheless, all electron microscopes suffer from a serious drawback. Since no living specimen can survive under their high vacuum, they cannot show the ever-changing movements that characterize a living cell. Using a microscope the size of his palm, Anton van Leeuwenhoek was able to study the movements of one-celled organisms. Modern descendants of van Leeuwenhoek's light microscope can be over 6 feet tall, but they continue to be indispensable to cell biologists because, unlike electron microscopes, light microscopes enable the user to see living cells in action. The primary challenge for light microscopists since van Leeuwenhoek's time, has been to enhance the contrast between pale cells and their paler surroundings so that cell structures and movement can be seen more easily. To do this they have devised ingenious strategies involving video cameras, polarized light, digitizing computers and other techniques that are yielding vast improvements in contrast, fueling a renaissance in light microscopy. As late as the 1980's, only a few doctors and college professors owned a microscope. Today they are an essential tool in every high school, college, hospital, and research laboratory. Learning the basic parts and functions of a microscope is only the beginning of our study. You must also become familiar with some conceptual definitions concerning microscope operation: Compound Microscope: A type of microscope that uses multiple lenses to increase total magnification. The microscopes in our lab are considered to be parfocal because they have both ocular and objective lenses. Field of View: The total area that you see when looking through the microscope. Total Magnification: The total magnification of any specimen being viewed is equal to the power of the ocular lens multiplied by the power of the objective lens in place at that time. All of our ocular lenses magnify 10 diameters (or 10X). Hence, if you had the 44X objective lens in place (which magnifies 44 diameters) then the total magnification is 440 times (10X * 44X = 440X). Parfocal: The ability to keep primary focus when changing from low power to high power. In theory, the viewable image will remain in the same field of view after you change from low power to high power, and then you will only need to do some fine adjustment to focus the image at high power. Resolution (or resolving power): The ability to discriminate two close objects as being separate from one another. Resolving power is determined by the amount and type of visible light that enters the microscope. In general, the greater the amount of light that is delivered to the objective lens, the greater the resolution. It is important to note that the amount of light reaching the ocular is reduced with the increase in objective magnification. Hence, you will usually need to increase the light intensity at greater magnifications. You may be wondering if the field of view increases or decreases as total magnification increases. In short, as total magnification increases, the field of view would decrease. Think about this concept in units of magnification: imagine that you have your microscope in focus and can see 9 "units" in your field of view. You want to "zoom in" on an object in the center unit, so you switch to a higher magnification power. Now you only have about 2 units in your field of view. It's similar to zooming in on an object with a camera lens - as you zoom in on the object you can see less of the surrounding area; hence, your field of view has decreased.
|
|
 |
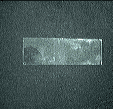
slide - rectangular piece of glass or plastic on which you place the specimen |
 |
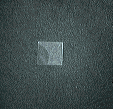
cover-slip - thin, square piece of glass or plastic which you place over the specimen on the slide |
|
Dry Mount - requires no water; usually used for inanimate objects that don't require water to live. Wet Mount - requires water; used to prepare slides that hold living organisms (mobile or not). Staining Specimens - Lugol's iodine, methylene blue, or crystal violet may be added to specimens in order to increase contrast. The stain can be directly added to the water when first preparing the slide or it can be added later after first viewing the specimen without the stain. Add a drop of the stain along one edge of the cover-slip. Placing a piece of paper towel along the opposite edge of the cover-slip will help draw the stain under the cover-slip. CAUTION: these dyes will stain skin and clothing; they are also harmful if ingested.
< Bacteria & Plants > < Cells & Heredity > < Human Biology & Health > < Microscope Lab > < Microscope Safety > < Parts of the Microscope > < Website Directory > |
|